
How to Spatchcock a Chicken: A Step-by-Step Guide
Spatchcocking a chicken is a simple technique that makes cooking a whole chicken faster, easier, and more flavorful. By removing the backbone, you allow the chicken to cook more evenly and quickly, resulting in a juicy interior and crispy skin. Follow this easy guide to learn how to spatchcock a chicken like a pro!
What You’ll Need:
-
1 whole chicken (3–4 lbs is ideal)
-
Sharp kitchen shears or a boning knife
-
A cutting board (preferably with a groove to catch any juices)
-
Paper towels
-
A sharp chef’s knife (optional)
-
A baking sheet or roasting pan for cooking
Step-by-Step Instructions:
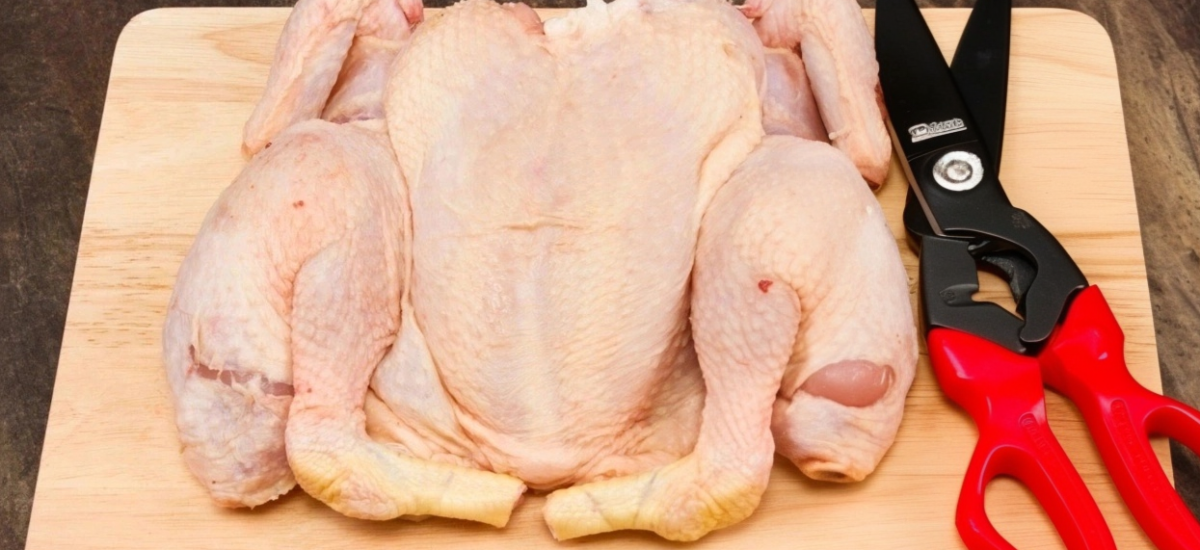
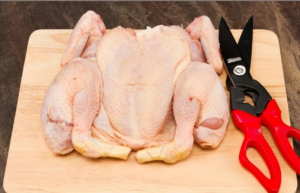
Step 1: Prepare the Chicken
Place the chicken on a clean cutting board, breast-side down. Pat the chicken dry with paper towels to remove any excess moisture, which helps the skin get crispy during cooking.
Step 2: Remove the Backbone
Using sharp kitchen shears or a boning knife, cut along both sides of the chicken’s backbone. Start at the tail end and work your way up to the neck. This step can take some pressure, so make sure you have sharp tools.
Pro Tip: Save the backbone for making homemade chicken stock!
Step 3: Flatten the Chicken
Once the backbone is removed, flip the chicken over so the breast is facing up. Using your hands, press firmly down on the breastbone until you hear a slight crack. This flattens the chicken and helps it cook evenly.
Step 4: Trim the Wings (Optional)
If you prefer smaller wings, use your kitchen shears to trim the wing tips. This step is optional but can make the chicken more uniform in size and easier to fit on your cooking surface.
Step 5: Season the Chicken
Now that the chicken is spatchcocked, it’s time to season it! Rub the chicken with olive oil, salt, pepper, and any other spices or herbs you prefer. You can also slide garlic, lemon, or fresh herbs under the skin for extra flavor.
How to Cook Your Spatchcocked Chicken:
-
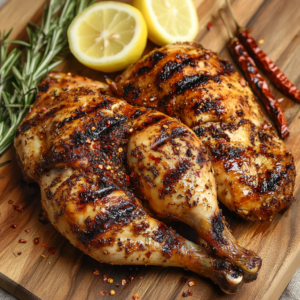
Oven Roasting: Preheat your oven to 425°F (220°C). Place the spatchcocked chicken on a baking sheet or in a cast-iron skillet. Roast for 40–50 minutes, or until the internal temperature of the thickest part of the breast reaches 165°F (74°C).
-
Grilling: Preheat your grill to medium-high heat. Place the chicken skin-side down and grill for 10–15 minutes. Flip the chicken and cook for another 20–30 minutes, or until the internal temperature reaches 165°F (74°C).
Why Spatchcocking Is the Best:
-
Even Cooking: Spatchcocking allows the chicken to cook evenly, so the skin becomes crispy while the meat stays juicy.
-
Faster Cooking: Flattening the chicken reduces cooking time, making it a quicker meal option than a whole roasted chicken.
-
Flavorful: The exposed skin allows marinades and seasonings to penetrate deeply, adding even more flavor to the chicken.
Tips for Perfect Spatchcocked Chicken:
-
Bring to Room Temperature: Let the chicken rest at room temperature for about 30 minutes before cooking. This ensures more even cooking.
-
Dry the Chicken: Pat the chicken dry before seasoning or cooking. This helps achieve that crispy, golden skin.
-
Use a Meat Thermometer: For the most accurate results, use a meat thermometer. The chicken is done when the internal temperature reaches 165°F (74°C) in the thickest part of the breast.
Spatchcocking is a fantastic technique that makes cooking a whole chicken faster and more flavorful. Once you try it, you’ll wonder why you ever cooked a whole chicken any other way!
Additional Tips for Perfect Spatchcocked Chicken:
-
Marinate for Extra Flavor: Marinating your chicken for a few hours (or overnight) in the fridge can make it even juicier and more flavorful. Use a marinade with ingredients like lemon, olive oil, garlic, and fresh herbs for added tenderness and taste.
-
Dry Brine for Crispy Skin: If you’re planning ahead, dry brining can help achieve the crispiest skin. Simply sprinkle the chicken with salt and leave it uncovered in the fridge for a few hours or overnight. This helps draw out moisture, which in turn makes the skin crispier when cooked.
-
Use a Cast-Iron Skillet: For an extra crispy skin, cook your spatchcocked chicken in a cast-iron skillet. The skillet will give the chicken an even heat distribution and crisp the skin to perfection.
-
Add Vegetables for a One-Pan Meal: While the chicken roasts, you can add vegetables like potatoes, carrots, onions, or bell peppers to the pan. Toss them with olive oil, salt, and pepper, and place them around the chicken. The veggies will cook in the chicken juices, making them flavorful and tender.
-
High Heat for Crispiness: To get an especially crispy skin, consider increasing the oven temperature to 475°F (245°C) for the last 10 minutes of cooking. This will give your chicken an irresistible golden finish.
-
Rest Your Chicken: After removing the chicken from the oven or grill, let it rest for at least 10 minutes before slicing. This helps redistribute the juices, making the meat more tender and flavorful.
-
Flavored Butters: For extra richness, melt some butter with fresh herbs or garlic and drizzle it over the chicken right before serving. It adds an extra layer of flavor and makes the chicken even juicier.
-
Grill with Wood Chips: For a smoky flavor, consider adding some wood chips to your grill. Applewood or hickory chips will infuse a subtle smokiness into your chicken, elevating the flavor profile.
-
Try Different Spices: Feel free to experiment with different seasoning blends like rosemary, thyme, chili powder, or lemon zest. Customizing your spice mix can completely change the flavor of your spatchcocked chicken!
-
Serve with Sauces: Serve your spatchcocked chicken with a side of your favorite dipping sauces like barbecue sauce, chimichurri, or a tangy mustard-based sauce. These can enhance the flavor and provide a fresh contrast to the crispy skin.
By incorporating some of these tips, you can take your spatchcocked chicken to the next level. The beauty of this technique is how versatile it is, allowing you to tailor it to your taste and preferences. Happy cooking!